 by
by Follow this simple process to create effective, appealing apparel product photos with live models
Step 1: Pick a model
There are three basic factors to consider when choosing a model: 1. The extent to which you feel comfortable working with him or her, 2. Whether or not the model will be available to you long term, and 3. how your apparel looks on the model. It’s very important to select one model or several models that you feel comfortable working with; the less you have to fumble around establishing a good flow of communication between you and your model(s), the more efficient and productive your photoshoots will be.
Step 2: Setup your space
The space you should allot for the shoot depends on the situation. Your model should have enough space to be able to move freely to follow your cues. However, it’s also a good idea not to stumble on the side of having too large a shooting area. Designating specific backdrop boundaries will not only help your model stay in the frame, but it will also help you know exactly where to aim the camera.
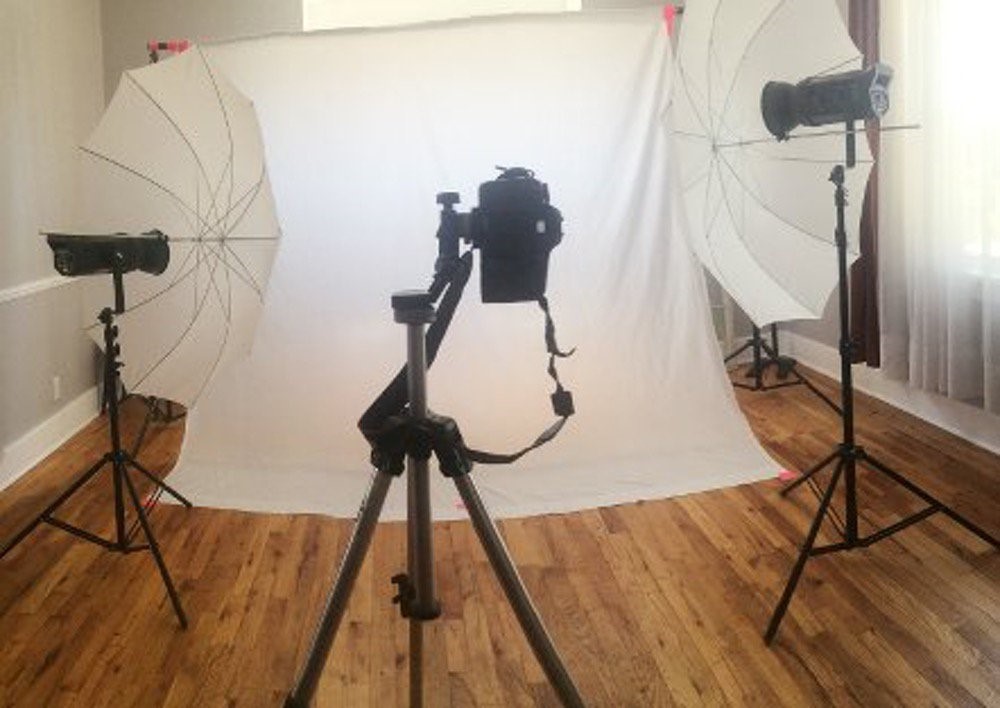
Make sure that you have the proper equipment and space needed to achieve high-quality images. Some examples of necessary equipment: a white backdrop such as a sheet or seamless rolled paper, a tripod to mount your camera, and 1-3 continuous softbox ensembles or 1-3 external speedlight and umbrella ensembles.
Step 3: Create Just the Right Light

As mentioned earlier, renting or buying proper lighting equipment is another critical requirement to creating effective product images. The most common setups consist of 3 continuous softbox lights or 3 external speedlight and umbrellas.
When considering your photography lighting setup, remember that your goal should be to find a way to mimic the softness of natural window light; softboxes do this automatically, but even with umbrellas, speedlights can sometimes be too harsh and direct.
If that’s the case, simply angle your speedlights off to either side of the model so that the light bounces off of nearby walls. Don’t be afraid to experiment—only experiment before the photoshoot to maximize your efficiency when the model arrives.
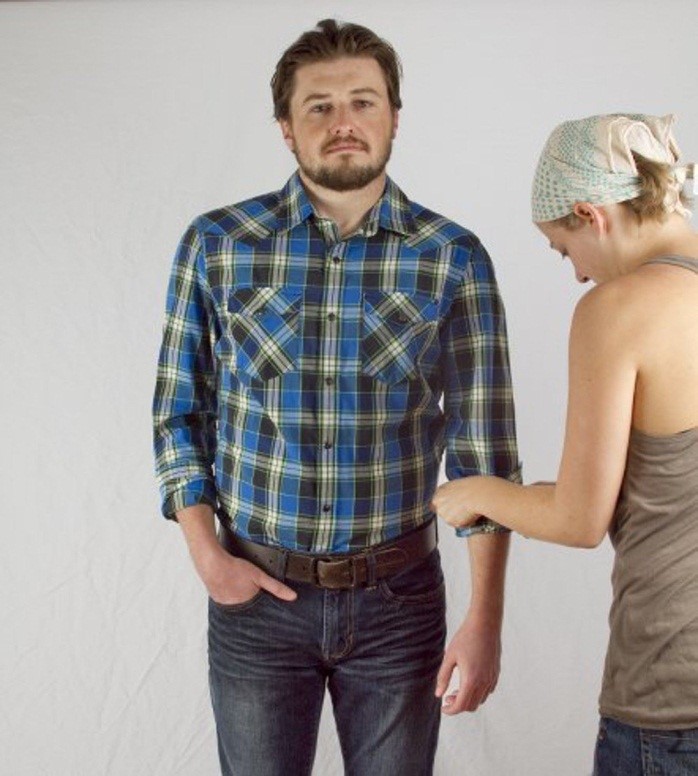
Step 4: Position Your Model
Once your lighting and backdrop setup is finalized and your model arrives for the photoshoot, it’s up to you to explain your vision to the model and effectively position the model in that prepared space to achieve your vision. The easiest way to ensure that your model is standing right where you need him or her to be is to place an “X” on the floor directly in line with your camera, either beneath the model’s feet so that he or she knows where to stand or closer to the camera so that he or she can “line up” with it. Whichever you choose, the “X” establishes a “target” for your model to position them in relation to, ensuring that you don’t have to make a lot of adjustments to keep the model right where you need them to be in your frame.
Step 5: Shoot with Wide Framing
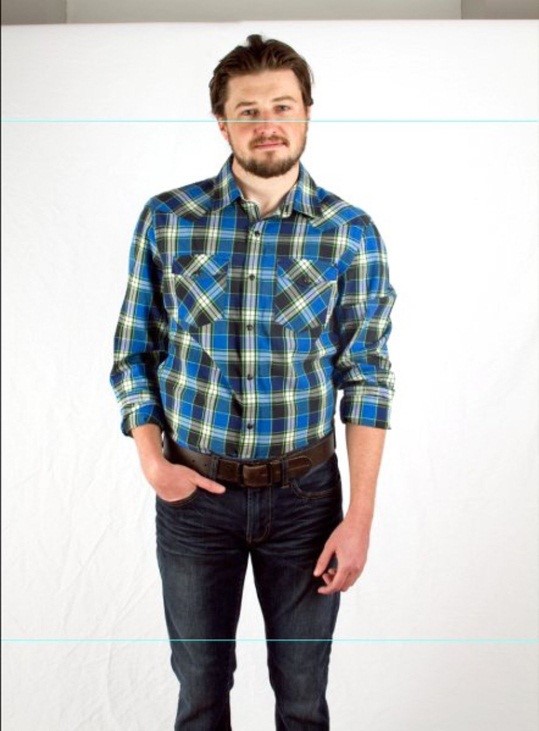
Because there is a large amount of variation in the web standards for crop and sizing, it is a good idea to shoot your product photos with “wide framing.” This simply means that you should leave ample space on all sides of the model to ensure that you’re able to crop the image down to comply with web requirements. It’s better to have too much space, which can be fixed with a bit of cropping, than too little space, which might render an image unusable. Likewise, always keep your model’s arms and legs in the frame.
While some companies and brands do include the faces and expressions of their models in their product images, many crop out those identifying features to minimize distraction from the apparel in question. Cropping models’ faces is a great option if you’re just starting out because it can potentially save a good deal of time and money.
We provide the product photography in Mumbai, If you need such services then let us know.